

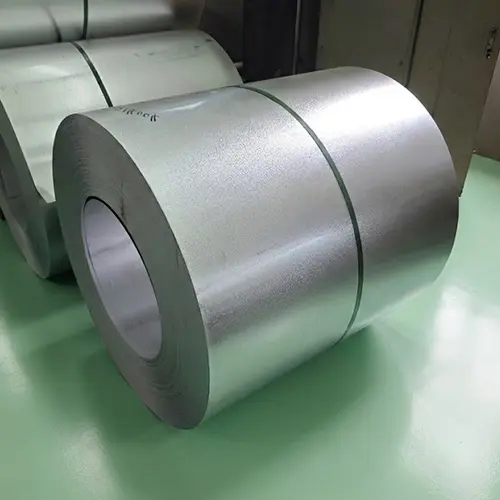
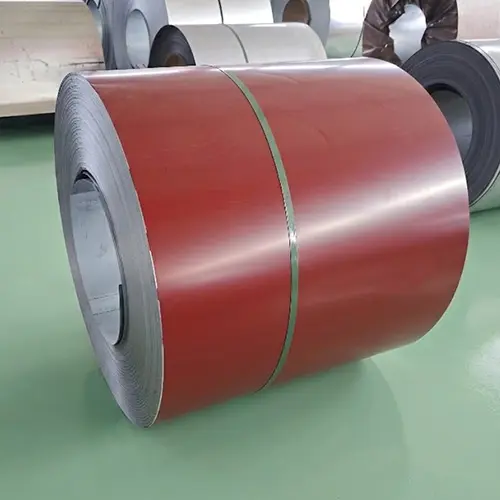

You often find surface defects in PPGI and galvanized coils that affect both performance and appearance. Common defects include scale, scratches, and pits. The table below shows these defects and their descriptions:
| Defect Type | Description |
|---|---|
| Scale | A layer of oxidized metal that forms during hot rolling, affecting appearance and processing if not removed. |
| Scratches | Marks caused by rough handling or equipment, which can weaken the steel and lead to corrosion. |
| Pits | Small depressions caused by impurities or improper conditions, which can reduce strength and promote corrosion. |
Recognizing these defects helps you maintain quality and prevent costly issues. You also need to understand why some PPGI coils cause roller marks during forming so you can take action early.

Key Takeaways
- Surface defects like scale, scratches, and pits can harm the performance and appearance of PPGI and galvanized coils.
- Regular inspection using visual checks and touch tests helps catch defects early, preventing costly repairs.
- Maintaining clean and smooth surfaces during handling and storage reduces the risk of scratches and other damage.
- Controlling the coating process and ensuring proper equipment maintenance prevents issues like missed coating and poor adhesion.
- Understanding the causes of defects, such as environmental factors and equipment issues, allows for better prevention strategies.
- Using quality materials and consistent application methods improves the overall quality of the coils.
- Training your team to recognize and report defects fosters a culture of quality and care in production.
- Implementing a strong quality control system ensures high customer satisfaction and reduces the risk of returns.
Surface Defects Overview
What Are Surface Defects
Surface defects are visible or hidden flaws that appear on the surface of PPGI (Pre-Painted Galvanized Iron) and galvanized coils. You might see these as marks, dents, pits, or even color changes. These defects can form during manufacturing, handling, or storage. For example, scratches can happen when coils rub against rough surfaces. Pits may develop if the steel reacts with moisture or chemicals.
Tip: Always check both sides of the coil for defects. Some flaws only show up on one side.
You should know that surface defects can affect more than just how the coil looks. They can also change how the material performs during forming, painting, or installation. Even small defects can lead to bigger problems if you do not catch them early.
Why Surface Quality Matters
Surface quality plays a big role in the value and usefulness of PPGI and galvanized coils. When you use coils with clean, smooth surfaces, you get better results in your final products. Here are some reasons why you should care about surface quality:
- Durability: Defects like pits or scratches can let moisture in, which leads to rust and weakens the steel.
- Appearance: Visible marks or stains can make your finished products look cheap or poorly made.
- Performance: Some defects can cause paint or coatings to peel off, which reduces protection and lifespan.
- Customer Satisfaction: High-quality surfaces help you meet customer expectations and avoid complaints.
If you ignore surface defects, you risk higher costs from repairs, returns, or even lost business. You can save time and money by catching and fixing defects early.
Inspection Methods
You have several ways to inspect PPGI and galvanized coils for surface defects. Some methods are simple and quick, while others use special tools or machines. Here are the most common inspection methods:
- Visual Inspection: You look at the coil under good lighting. You check for scratches, stains, dents, or color changes. This method works well for finding obvious defects.
- Touch Inspection: You run your hand over the surface to feel for rough spots, bumps, or dips. Sometimes you can feel defects that are hard to see.
- Magnifying Glass or Microscope: You use these tools to find tiny pits or cracks that you might miss with your eyes alone.
- Automated Scanners: Some factories use machines with cameras and sensors. These scanners can check the whole coil quickly and spot even small defects.
Note: You should always inspect coils before and after processing. Early detection helps you prevent bigger problems later.
By using these inspection methods, you can keep your coils in top shape and deliver better products to your customers.
Roller Marks in PPGI Coils
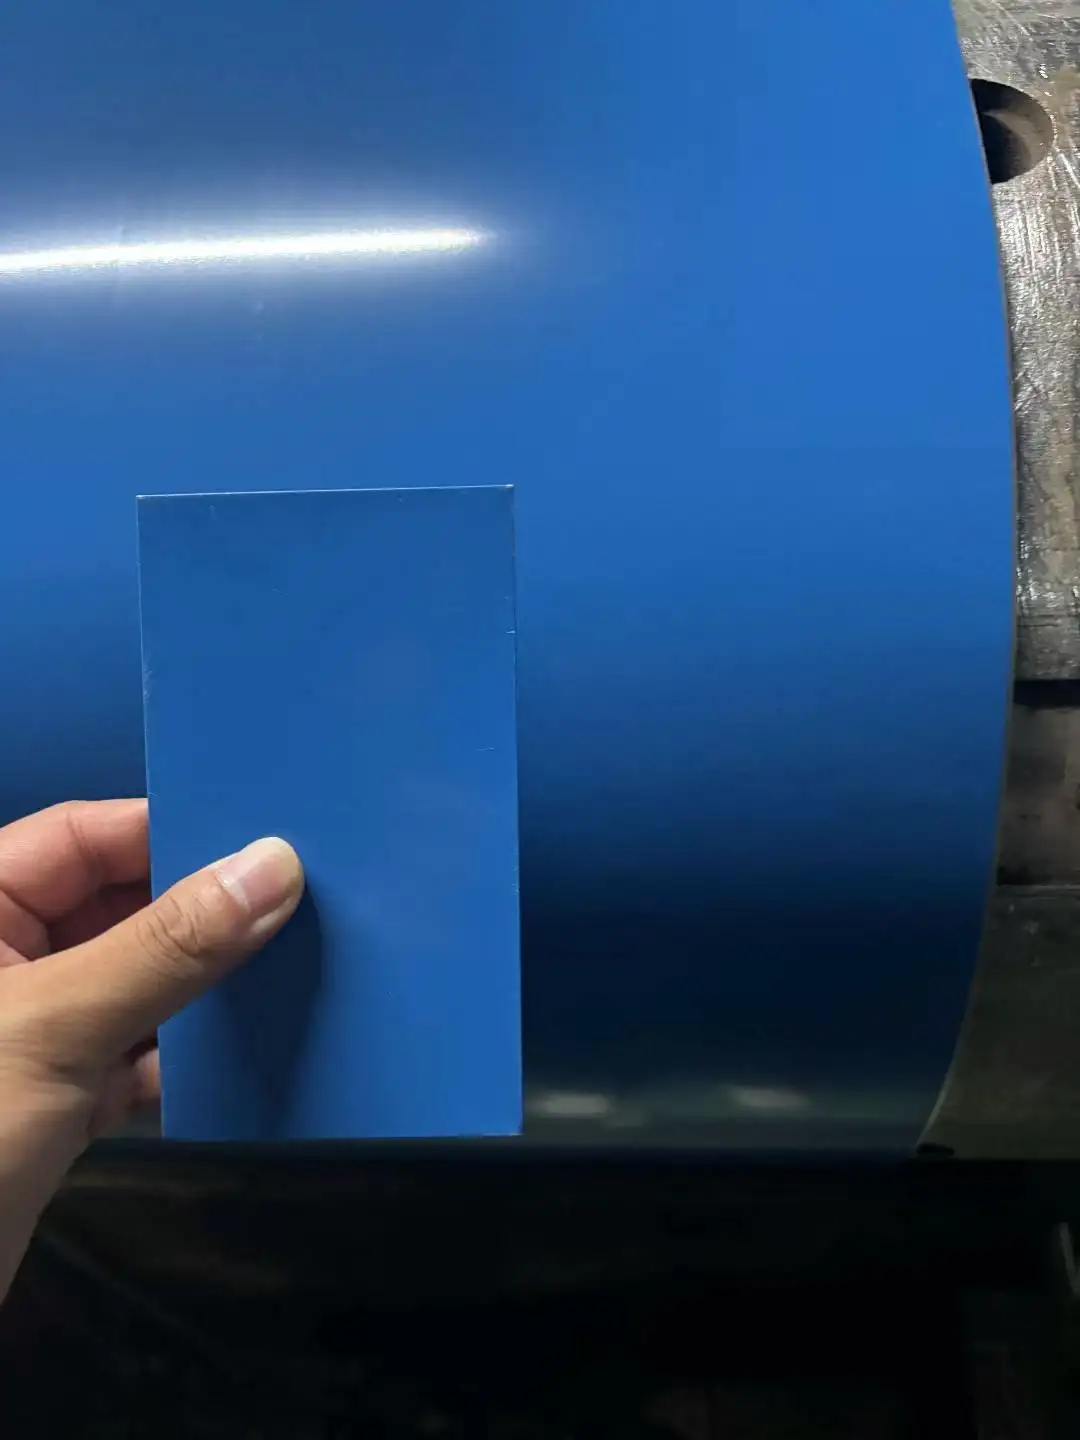
Why Some PPGI Coils Cause Roller Marks During Forming
You often see roller marks when you form PPGI coils. These marks appear because the rollers press against the surface during shaping. If you want to understand why some PPGI coils cause roller marks during forming, you need to look at several factors. The coating thickness, roller pressure, and coil surface quality all play a role. When the coating is too thin or uneven, the rollers can leave visible lines. If the rollers have rough surfaces or dirt, they scratch the coil and create marks.
You also need to check the temperature during forming. High temperatures can soften the coating, making it easier for rollers to leave marks. Sometimes, the speed of the rollers affects the surface. Fast rollers can cause friction and heat, which leads to more defects. If you ask why some PPGI coils cause roller marks during forming, you should examine the equipment and the coil itself. Poor maintenance or improper setup often leads to these problems.
Tip: Clean and inspect your rollers before every forming session. This simple step helps you avoid unwanted marks.
Visual Signs of Roller Marks
You can spot roller marks by looking for straight or wavy lines on the coil surface. These lines usually run in the direction of the rollers. Sometimes, you see shiny streaks or dull patches where the coating has changed. Roller marks may appear as grooves, scratches, or even slight indentations. If you touch the coil, you might feel rough spots or raised lines.
Here is a table that shows common visual signs and what they mean:
| Visual Sign | What It Means |
|---|---|
| Straight lines | Roller pressure too high |
| Wavy streaks | Uneven roller speed |
| Shiny patches | Coating softened by heat |
| Grooves or dents | Roller surface not smooth |
You should always check both sides of the coil. Sometimes, roller marks only show up on one side because of uneven pressure.
Prevention of Roller Marks
You can prevent roller marks by following a few simple steps. First, make sure your rollers are clean and smooth. Dirt or rough spots on the rollers cause scratches and marks. Adjust the roller pressure so it does not press too hard on the coil. If you want to avoid asking why some PPGI coils cause roller marks during forming, you should monitor the coating thickness. A uniform coating helps protect the surface from damage.
You also need to control the temperature and speed during forming. Keep the temperature steady and avoid overheating the coil. Slow down the rollers if you see signs of friction or heat. Regular maintenance of your equipment helps you prevent defects. Inspect your rollers and replace them if you see wear or damage.
Note: Use quality control checks after forming. Early detection of roller marks lets you fix problems before they reach your customers.
If you follow these steps, you reduce the risk of roller marks and improve the quality of your PPGI coils. You do not need to worry about why some PPGI coils cause roller marks during forming if you keep your process under control.
Holes and Pitting
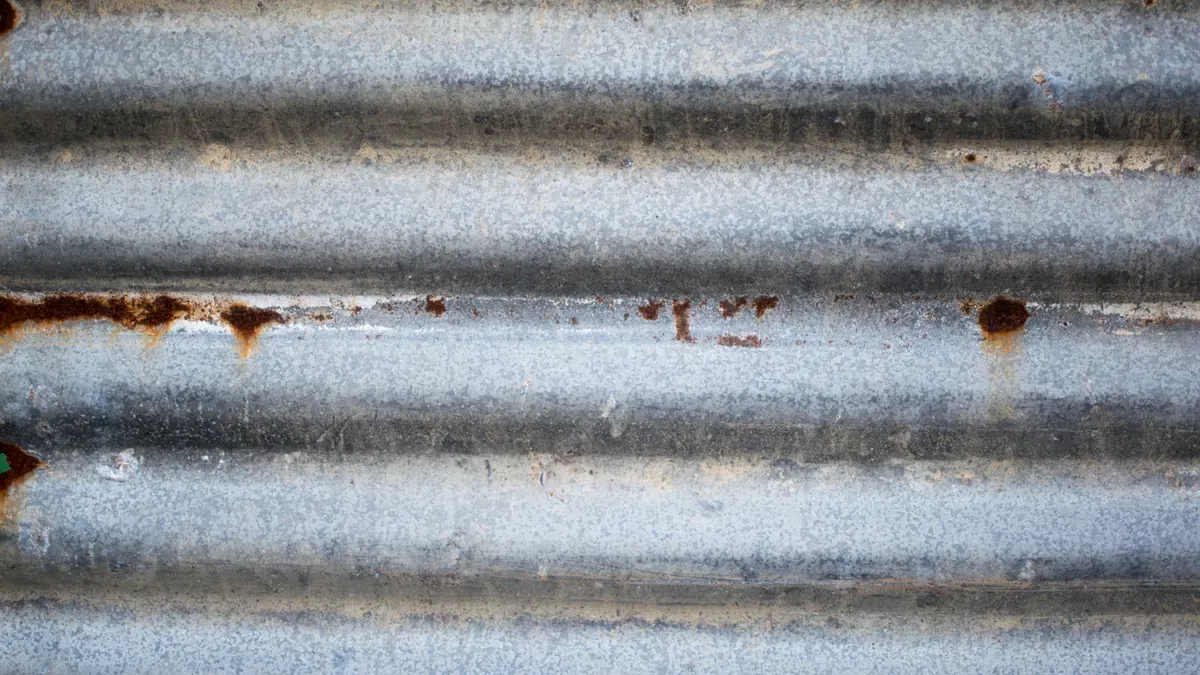
Causes of Holes
You often see holes in PPGI and galvanized coils when something interrupts the coating or metal surface. Holes usually form because of contamination, trapped air, or improper processing. If you use dirty steel or let dust settle on the coil before coating, you risk creating holes. Sometimes, air bubbles get trapped during the coating process. When these bubbles burst, they leave behind small holes. You also need to watch for uneven heating or cooling. Rapid temperature changes can cause the metal to expand or contract, which leads to cracks and holes.
Here are some common causes of holes:
- Impurities in the steel or coating
- Air bubbles trapped during coating
- Dust or debris on the coil surface
- Rapid temperature changes during processing
- Mechanical damage from tools or equipment
Tip: Always clean the coil and check for contaminants before starting the coating process.
Identifying Pitting
Pitting looks like tiny depressions or craters on the surface of your coil. You can spot pitting by looking for small, round marks that appear in clusters or alone. These pits often feel rough when you run your hand over the surface. Sometimes, pitting appears as dark spots or stains. You should inspect the coil under good lighting to see these defects clearly.
Use this table to help you identify pitting:
| Feature | What to Look For |
|---|---|
| Shape | Small, round depressions |
| Location | Random or clustered spots |
| Texture | Rough or uneven surface |
| Color | Dark spots or stains |
You can use a magnifying glass or microscope to see tiny pits that are hard to spot with your eyes. If you find pitting, you need to check if it goes deep into the metal. Deep pits can weaken the coil and lead to corrosion.
Alert: Pitting often signals a bigger problem with moisture or chemical exposure. You should investigate the cause right away.
Prevention Strategies
You can prevent holes and pitting by following a few key steps. First, keep your work area clean. Remove dust and debris before coating the coil. Use high-quality steel and coatings to reduce impurities. Control the temperature during processing to avoid rapid changes. Inspect your equipment for damage or wear. Replace faulty tools to prevent mechanical defects.
Here are some prevention strategies:
- Clean coils and equipment before processing.
- Use pure materials and quality coatings.
- Monitor temperature and avoid sudden changes.
- Inspect for air bubbles during coating.
- Check finished coils for pits and holes.
Note: Regular inspection helps you catch defects early. If you find holes or pitting, fix the cause before processing more coils.
By using these strategies, you protect your coils from holes and pitting. You improve the quality and lifespan of your products. You also reduce the risk of costly repairs or returns.
Dezincification and Zinc Slag
Dezincification Causes
Dezincification happens when zinc leaves the surface of your galvanized coil. You see this problem most often in areas with high moisture or chemicals. When water or acid touches the zinc layer, it reacts and removes zinc from the steel. This process leaves behind a weak, porous surface. You may notice a reddish or dull gray color where the zinc has disappeared.
Here are some main causes of dezincification:
- High humidity: Moist air speeds up the reaction between zinc and water.
- Acidic or salty environments: Acid rain or salt spray attacks the zinc layer.
- Poor passivation: If the coil does not have a good protective layer, zinc can dissolve faster.
- High temperature: Heat can make the zinc react more quickly with chemicals.
Alert: Dezincification weakens the coil and makes it more likely to rust. You should check for this defect if you store coils in damp or harsh places.
Zinc Slag Inclusions
Zinc slag inclusions look like small bumps or rough spots on the coil surface. These defects form when bits of solid zinc or other particles get trapped in the coating during the galvanizing process. You may see these as raised dots, streaks, or even lumps. Sometimes, the inclusions break through the coating and expose the steel underneath.
You can spot zinc slag inclusions by looking for:
| Feature | What to Look For |
|---|---|
| Texture | Rough, uneven patches |
| Appearance | Small bumps or streaks |
| Color | Dull gray or white spots |
| Location | Random or along the coil edges |
Zinc slag inclusions can cause problems during painting or forming. Paint may not stick well to these spots. The coil may also crack or peel in these areas.
Tip: Always inspect the coil surface under good lighting. Use your hand to feel for rough spots that you might miss with your eyes.
How to Prevent
You can prevent dezincification and zinc slag by following good practices during production and storage. Here are some steps you should take:
- Control the environment: Store coils in dry, clean areas. Avoid places with high humidity or chemicals.
- Use proper passivation: Make sure each coil gets a strong protective layer after galvanizing.
- Monitor bath temperature: Keep the zinc bath at the right temperature to avoid forming slag.
- Clean the steel before coating: Remove dust, oil, and rust to prevent inclusions.
- Inspect equipment: Check for worn or dirty tools that might add particles to the coating.
Note: Regular inspection helps you catch defects early. If you find signs of dezincification or zinc slag, fix the cause before making more coils.
By following these steps, you protect your coils from damage and improve their lifespan. You also make sure your products look better and last longer.
Air Knife Streaks and Passivation Spots
Air Knife Streaks
You often see air knife streaks on galvanized coils after the zinc coating process. These streaks appear when the air knife, which blows off excess zinc, does not work evenly. You may notice long, straight lines or bands running along the coil. Sometimes, these streaks look shiny or dull compared to the rest of the surface. Uneven air pressure, dirty nozzles, or incorrect distance between the air knife and the coil can cause these marks.
You can spot air knife streaks by checking for:
| Feature | What to Look For |
|---|---|
| Direction | Parallel lines or bands |
| Appearance | Shiny or dull streaks |
| Location | Across the coil width |
| Consistency | Repeating patterns |
Tip: Inspect the coil under bright light. Streaks often show up more clearly when you tilt the coil.
Passivation Spots
Passivation spots form when the protective layer applied after galvanizing does not cover the coil evenly. You may see round or irregular patches that look brighter or darker than the surrounding area. These spots can appear because of uneven spraying, contaminated chemicals, or improper drying. Passivation spots make the coil surface look patchy and can reduce corrosion resistance.
You can identify passivation spots by looking for:
- Circular or blotchy marks
- Areas with different gloss or color
- Spots that feel slick or sticky
- Patches that appear after storage
Alert: Passivation spots can signal problems with the chemical process. You should check your equipment and materials if you see these defects.
Prevention and Control
You can prevent air knife streaks and passivation spots by following careful process controls. Start by cleaning and maintaining your air knife equipment. Adjust the air pressure and nozzle position to ensure even zinc removal. Use quality chemicals for passivation and apply them with well-calibrated sprayers. Dry the coil thoroughly to avoid patchy spots.
Here are some prevention steps:
- Clean air knife nozzles before each run.
- Set air pressure to the recommended level.
- Check nozzle distance and alignment.
- Use fresh passivation chemicals.
- Calibrate sprayers for even coverage.
- Dry coils completely after passivation.
Note: Regular inspection helps you catch defects early. If you find streaks or spots, stop production and fix the cause before continuing.
You improve coil quality and reduce complaints when you control these defects. Consistent process checks and equipment maintenance help you deliver better products every time.
Striations, Scratches, and Abrasions
Striations and Stress Lines
You may notice striations and stress lines as faint, parallel marks running along the surface of PPGI and galvanized coils. These lines often appear during the passivation process or when the coil passes through rollers. Striations can make the surface look uneven or streaky. Stress lines sometimes show up as slight color changes or dull streaks.
Several factors can cause these defects. The table below shows the most common causes and their descriptions:
| Cause of Defect | Description |
|---|---|
| Passivation squeeze roller distortion | This can lead to the formation of passivation spots on the surface. |
| Long distance of tuyere from steel edge | Results in reduced pressure from the squeeze roller, causing misalignment and defects. |
| Improper functioning of squeeze roller | Can lead to drying of the passivation solution, resulting in surface marks. |
| High temperature of passivation fluid | Causes the passivation film to become too heavy, leading to discoloration. |
| Excessive temperature in passivation gutter | Can negatively affect the surface quality of the steel. |
You should check your equipment settings and monitor the temperature during passivation. If you see striations or stress lines, inspect the rollers and the passivation system right away.
Tip: Regularly calibrate your rollers and keep the passivation fluid at the recommended temperature to reduce these defects.
Scratches and Abrasions
Scratches and abrasions are some of the most visible surface defects. You can spot them as thin lines, gouges, or scuffed areas on the coil. These marks often happen when you handle coils roughly or let them touch sharp objects. Scratches can form during production, storage, or transportation.
Here is how scratches and abrasions can affect your coils:
- Scratches may occur at any stage, from manufacturing to delivery.
- Rough handling or contact with sharp tools often causes these marks.
- These imperfections do more than harm the appearance. They weaken the steel and make it easier for rust to form.
- Damaged areas can lead to faster fatigue and reduce the lifespan of your product.
If you ignore scratches and abrasions, you risk sending out coils that fail sooner and look less appealing.
Alert: Even small scratches can grow into bigger problems if you do not address them quickly.
Prevention Tips
You can prevent striations, scratches, and abrasions by following a few simple steps:
- Inspect rollers and passivation equipment before each use.
- Keep the passivation fluid at the correct temperature.
- Handle coils with care. Use soft slings or padded tools to move them.
- Store coils on clean, smooth surfaces to avoid contact with sharp edges.
- Train your team to spot and report defects early.
- Use protective covers during transportation.
Note: Early detection and careful handling help you maintain high-quality surfaces and reduce costly repairs.
By following these tips, you protect your coils from common surface defects and deliver better products to your customers.
Coating Defects
Missed Coating
You may notice missed coating as bare patches or unpainted spots on your PPGI or galvanized coil. These areas stand out because they lack the protective layer. Missed coating usually happens when the paint or zinc does not cover the entire surface. You might see this defect near the coil edges or in places where the surface was not cleaned well before coating.
Here are some common causes of missed coating:
- Dirty or oily surfaces before coating
- Faulty spray or roller equipment
- Uneven application of paint or zinc
- Blocked nozzles or rollers
Tip: Always clean the coil thoroughly and check your equipment before starting the coating process.
You can spot missed coating by looking for shiny metal areas or dull patches that do not match the rest of the coil. Missed coating leaves the steel exposed, which increases the risk of rust and weakens the coil.
Poor Adhesion
Poor adhesion means the coating does not stick well to the coil surface. You may see the paint or zinc layer peeling, flaking, or bubbling. This defect often appears when the surface was not prepared properly or when the coating material was not mixed or applied correctly.
Here are signs of poor adhesion:
| Sign | What It Looks Like |
|---|---|
| Peeling | Coating lifts off in sheets |
| Flaking | Small pieces break away |
| Bubbling | Raised blisters or bubbles |
| Chipping | Coating cracks and falls off |
You can prevent poor adhesion by making sure the coil surface is clean and dry. Use the right coating materials and follow the recommended application steps. If you see signs of poor adhesion, stop production and fix the cause before coating more coils.
Alert: Poor adhesion reduces protection and makes your coil more likely to rust or fail during use.
Color Differences
Color differences show up when the coating does not match across the coil. You may see patches that look lighter, darker, or have a different shade. These differences can make your product look uneven and lower its value.

Common causes of color differences include:
- Uneven mixing of paint or coating materials
- Changes in temperature or humidity during coating
- Using different batches of paint or zinc
- Incorrect application thickness
You can spot color differences by comparing the coil under good lighting. Look for areas that do not match the rest of the surface. Color differences may not affect performance, but they can hurt the appearance and customer satisfaction.
Note: Always use the same batch of coating material and keep the process conditions steady to avoid color differences.
If you pay attention to these coating defects, you improve the quality and appearance of your coils. Regular inspection and careful process control help you catch problems early and deliver better products.
Bare Spots and Peeling
You often see bare spots and peeling on PPGI and galvanized coils when the coating fails to cover or stick to the surface. Bare spots look like exposed metal patches. Peeling shows up as the coating lifting, curling, or flaking away. These defects make your coil vulnerable to rust and reduce its lifespan.
Common Causes of Bare Spots and Peeling:
- Dirty or oily surfaces before coating
- Uneven or thin coating application
- Faulty spray or roller equipment
- Poor surface preparation
- Using incompatible coating materials
- Excessive bending or forming after coating
Alert: Bare spots and peeling often signal a problem with your coating process. You should investigate the cause right away to prevent further damage.
You can spot bare spots by looking for shiny or dull areas that do not match the rest of the coil. These patches usually appear near the edges, corners, or places where the surface was not cleaned well. Peeling often starts at these bare spots and spreads as the coil bends or flexes.
How Bare Spots and Peeling Affect Your Coil:
| Defect | Impact on Coil |
|---|---|
| Bare Spots | Exposes steel to moisture, leading to rust |
| Peeling | Reduces protection, causes coating to flake off |
You need to check your coil for these defects before shipping or using it. Bare spots and peeling can make your product look cheap and fail faster.
Prevention Tips for Bare Spots and Peeling:
- Clean the coil thoroughly before coating.
- Use quality coating materials that match the steel type.
- Inspect spray and roller equipment for blockages or wear.
- Apply the coating evenly and at the correct thickness.
- Avoid excessive bending or forming after coating.
- Store coils in dry, clean areas to prevent moisture damage.
Tip: Regular inspection helps you catch bare spots and peeling early. If you find these defects, stop production and fix the cause before coating more coils.
You improve coil quality and customer satisfaction when you prevent bare spots and peeling. Consistent process checks and careful handling protect your product from these common coating defects. If you follow these steps, you deliver better coils and reduce costly repairs or returns.
General Prevention and Quality Control
Surface defects can appear at any stage, so you need a strong prevention plan. You can protect your coils and improve quality by focusing on handling, process improvements, and regular inspection.
Handling and Storage
You must handle and store coils with care to avoid scratches, dents, and other defects. Use padded tools or soft slings when moving coils. Place coils on clean, smooth surfaces. Avoid stacking coils too high or letting them touch sharp objects. Keep storage areas dry and free from dust. Moisture and dirt can cause rust and pitting.
Tip: Always cover coils with protective wraps. This simple step keeps out moisture and prevents accidental damage.
You should train your team to follow safe handling practices. Make sure everyone knows how to spot and report defects. Good handling and storage reduce the risk of surface damage and keep your coils in top condition.
Process Improvements
You can prevent defects by improving your production process. Check your equipment before each run. Clean rollers, sprayers, and air knives to remove dirt and debris. Adjust machine settings to match the coil type and coating thickness. Use quality materials that fit your product needs.
Here is a table of process improvement actions and their benefits:
| Action | Benefit |
|---|---|
| Equipment calibration | Reduces uneven coating |
| Regular cleaning | Prevents inclusions and marks |
| Temperature control | Avoids pitting and streaks |
| Material quality checks | Stops missed coating and peeling |
You should review your process steps often. Look for ways to make them safer and more efficient. Small changes can lead to big improvements in coil quality.
Regular Inspection
You need to inspect coils at every stage. Use visual checks, touch tests, and automated scanners. Early detection helps you fix problems before they grow. Inspect coils before and after coating, forming, and storage.
Alert: Never skip inspection. Missing defects can lead to costly repairs and unhappy customers.
Set up a routine inspection schedule. Record defects and share findings with your team. Use inspection data to improve your process and prevent future issues. Regular inspection keeps your coils safe and your customers satisfied.
Best Practices Summary:
- Handle coils gently and store them in clean, dry areas.
- Keep equipment clean and calibrated.
- Use quality materials and control process settings.
- Inspect coils often and act fast when you find defects.
You build a strong quality control system by following these steps. Prevention and inspection help you deliver better coils and protect your business.
You play a key role in keeping PPGI and galvanized coils free from surface defects. Regular inspection and strong quality control help you spot issues early and protect your products.
Stay alert for signs of damage and use prevention strategies every day.
- Clean equipment and storage areas often
- Train your team to handle coils carefully
- Check surfaces before and after processing
You build trust with customers when you deliver high-quality coils.
FAQ
What causes most surface defects in PPGI and galvanized coils?
You often see defects from dirty surfaces, improper coating, or rough handling. Equipment issues and environmental factors like humidity also play a role. Regular cleaning and inspection help you prevent these problems.
How can you spot surface defects quickly?
You should use visual inspection under bright light. Run your hand over the coil to feel for rough spots. Automated scanners can help you find tiny defects that you might miss.
Are surface defects always visible?
No, some defects hide beneath the coating. You may need a magnifying glass or microscope to spot small pits or cracks. Always inspect both sides of the coil.
Can you fix surface defects after production?
You can repair minor scratches or stains with touch-up paint. Deep pits or holes often require replacing the coil. Prevention works better than repair.
Why do color differences appear on coated coils?
You see color differences when paint batches change or when temperature fluctuates during coating. Uneven mixing and application also cause this issue. Use consistent materials and process settings.
What is the best way to prevent scratches during handling?
You should use padded tools and soft slings. Store coils on smooth surfaces. Train your team to move coils carefully. Protective wraps help keep out dust and moisture.